Showing posts with label creative. Show all posts

Friday, May 2, 2014

short sleeves for spring

My mother-in-law loves to dote on her grandson. This makes me a happy momma, indeed!

Last week, we stopped in at a local children's resale shop, and she picked up a haul of great deals for Joshua to enjoy this spring and summer! A couple pairs of shorts, a Fisher Price bubble mower, and their everyday 10 onesies for $10 deal.

Four of the onesies happened to be long sleeved, and that's not so suitable for spring, right? But I had an idea...

...and I made them into short sleeved onesies!

You may remember that I wrote a silly little lament for my sewing machine. The machine is still out of commission, but a good friend of mine let me borrow her (new in the box!) machine for my little project. So generous! It was a dream to sew on such an easy-to-use, smooth machine. Everything went so perfectly. Thank you, Dena!

I cut off the sleeve at the length I wanted the finished sleeve to be. I used an existing short sleeved shirt of Joshua's to be sure it was a good length.

Then, I cut off the original shirt sleeve cuffs, turned them inside out, and fitted them over the newly-shortened sleeve so that the raw edges lined up.

Lastly, I stretched the fabric out and sewed straight-line stitches to reattach the "new" sleeve cuffs. Turned them back to the right side, trimmed threads, and there we go!
Cute? I think so! I'm pleased and happy to have some "new" play clothes for my little boy! Thanks, "Grandma!"

Wednesday, October 9, 2013

toddler mittens

Baby Joshua has a new carseat - one without a snuggly "bundleme" cover - and winter is coming! He already has a cute winter coat and a hat, but he needed mittens. Solution? Knit some!

Most baby mitten patterns are for thumbless mittens, because little ones aren't yet ready to use their thumbs most of the time. However, my toddler has begun to pick things up with his thumb and first finger, and I'm sure he'd be frustrated if his mittens didn't have a thumb. So, as usual, I've modified a pattern to make it work for us. I started with this pattern, making some changes.

First, I've added some length the the cuff, as an attempt to keep these mittens on Joshua's busy hands. I knitted 20 rows instead of the 8 recommended. This will allow me to fold the cuff over so that it's a bit more snug on his tiny wrist.

Second, I've added a thumb! I knit 8 rows in stockinette stitch after the ribbing. Then, at the beginning of row 9, I took a piece of scrap yarn in the same weight, and knit four stitches with the scrap yarn. I then placed the four new stitches back on the left needle and switched back to the main yarn.
please excuse the poor quality picture from my phone!
This created a thumb hole with 8 live stitches for me to knit later. When I had finished the mitten, I picked up four stitches above and below the scrap yarn, and then knit eight rows in the round. Then I knit two together all the way around, cut the yarn, and drew it through the stitches to finish it off.

Third, I finished off the main part of the mitten with kitchener stitch, rather than by drawing the yarn through the stitches. This way, I created a flatter mitten top.

Finally, I made I-cord to attach the two mittens. I'll thread the mittens through the sleeves of his jacket to keep them from getting separated. I hope this will also keep them on his hands a little longer!
Again, another phone picture.

 What do you think?


Linking up to Sew Much Ado's "We Did it! Wednesday" linky party
BLOG TITLE

Tuesday, September 4, 2012

before Baby bucket list

(just a few) Goals:

Make a taggie blanket, nursing cover, and an infant-size vest/hat/bootie set for our little guy
Make (unnamed projects: 6 knitted projects down, 2 of 4 sewn to go) for my sisters-in-law; their little babies are boys, too!
Go visit Niagara Falls - next weekend!
Knit something for charity - done
Decide on and make Christmas presents for the family (many done, 6 or so to go)
Make sugar cookies to freeze for Christmas - done
Enjoy more uninterrupted dinner-and-a-movie nights with the hubby
Prepare and freeze some meals to have after Baby is born
Get up-to-date on my scrapbooking, because I'll likely not have much energy to do it when he's born - caught up to this past April...
Learn how to use my nice camera in manual mode so that I can get great pictures of Baby in any lighting
...and so much more!


Thursday, August 30, 2012

Scandinavian snowflake hat

I made a hat! More knitting for our baby boy, of course.


I'm working my way through my yarn stash, trying very hard not to purchase anything new. As long as I keep my little feet out of craft stores and my mouse away from the Lion Brand website and Ravelry, we'll be good.

There was almost a full skein of navy blue acrylic yarn. I seem to remember purchasing it on a music ministry team trip in college, but I can't remember what the brand was...I only know we were at Wal-Mart. Funny. The light blue yarn is what was left of a Patons acrylic tweed skein that I bought to make infant hats for the little twin boys I watched when we lived in Ithaca. Together, the two colors look great! At least, I think so!
 
The hat is a toddler size, and will be just right for next winter, I hope. I borrowed the snowflake chart from this pattern, and I think I may retroactively add earflaps to my improvised hat pattern so that it looks a bit like this one. The tassel on the top was fun to knit, and an easy way to finish the project. The hat is thick and cozy - just right for our snowy winters. What do you think of it?


Wednesday, June 20, 2012

card making craftiness

The month of June is front-loaded with anniversaries, followed quickly by Father's Day. That means a lot of card making!

Here are some of the results:


These two anniversary cards turned out pretty cute!

This poppy-inspired one was fun to make - I first tore red music-printed scrapbook paper into four petals, ripping so that some white showed along the edges. Then, I cut a circle of dark purple-gray metallic paper into a circle, and cut fringe all along the edges. I put it all together with a black brad in the middle. Ta da!

This one is for my good friend, Sarah, and her husband, Stephen. See the little glittery "s" sticker I used for each of the birdie wings? I drew a bird silhouette on the back of a piece of (bunny print!) origami paper, and then cut two at a time (right sides of the paper together to make the birds face each other). I must have been in a fringe-y mood that evening, because I decided that they needed to sit in a bed of green grass.

And now, the Father's Day cards!


These two cards were time intensive! I made two of the tree cards - one for my dad, and one for Hubby's dad. We were planning to see Hubby's grandfather that weekend, too, so he got an extra-special card, as well.

For the tree card, I drew a leaf shape on the back of a piece of card stock, then traced it six times on a scrap of textured green card stock. I saved some time by cutting out of three types of paper at once - that's a lot of leaves!

I then free-handed a tree trunk, fashioned from brown textured card stock. Cut two! The next part - gluing all the little pieces in place - took some time.

The argyle Grandpa card was the most time-intensive card I've ever made, I think! I first had to look up the proportions of a rhombus. Geometry was a long time ago! For those of you who are like me and maybe don't remember, a rhombus, or diamond shape, can be created by four right triangles. I used four 3-4-5 triangles (Pythagorean). Do you remember this formula? a2 + b2 = c2

It means that you can figure out the length of each side of the triangle, because the smallest side, multiplied by itself; plus the next largest side, multiplied by itself; equals the longest side, multiplied by itself: 32+42=52 (ahem, 9+16=25). This is derived from the Pythagorean theorem, fellow math friends.

I kept it simple, and decided to follow the formula rather literally. So, each one of my triangles was 3/4" on one side, 4/4" (1 inch) on the next, and 5/4" (1.25") on the longest side. Bear with me as I sketch a drawing in Paint to explain.
 

There we go. You can see now, I hope, that a rhombus is made up of four right triangles. I showed the dimensions of mine in this picture (3/4", 4/4", and 5/4"). If you do what I did, you'll end up with a diamond shape that's 2" high, 1.5" across, and 1.25" on each diagonal side. Cool, right?

I traced my rhombus template onto four colors of card stock (these colors remind me of golf clothes - buttery yellow-cream chinos, orange polo shirt, brown saddle shoes, and blue caps), and cut away! I like the way the design turned out. To make the gold dots on top of the diamonds, I measured the center of each long side, putting a pencil dot at the 3/4" mark. I then used my trusty ruler to keep the dots 1/4" apart, and dotted away!
Do you like it? Would you try it? In a box, with a fox? (Seuss reference, friends.)


Tuesday, January 31, 2012

little things

This morning, I woke (as usual) before my alarm, and was so pleasantly surprised to be blessed with a sunny January day! I enjoyed the gentle glow filtering through my white curtains, said a prayer of thanks, and snuggled deeper into my cozy sheets for just a few more minutes.

I was ready for school earlier than usual, and decided to spend a little time outside before leaving. I grabbed my sparkling sunglasses, pulled on fuzzy warm boots, donned my white dress coat, and went out.
...and it was way too warm!

The sun was warm on my face, and most of the 6” of snow we had received yesterday was already melting away.
So, naturally, I seized the opportunity to make a snowman.

...with a mustache, of course!

He didn’t last all day, but the little happy memory did.
Thankful for the little things:

Brilliant blue sky
Fluffy clouds, just barely tinged pink, orange, purple, gray
Warm sunshine in January in New York (what???)
Extra time in my morning
Seizing moments to be creative
Peace in my home
Friends to take me to school
A little extra vitamin D in my day
Moments of happy

Thursday, December 22, 2011

string wrapped presents and cards and cookies!

Do you get as excited as I do about giving gifts? I love to find just the thing, and then to see the surprised, happy look on the person's face. That's pretty special! (I bet that's how God feels about giving gifts to us, too...)

Part of what gets me excited about the gift is how it's presented. Extra time and creativity put into the wrapping just makes it feel full of thoughtfulness and love! This is why it takes me a good week to wrap Christmas presents. I just want each one to look great on the inside and the outside!

This year, I closed some of the tissue-wrapped interiors of boxes with monogram stickers or letters to spell out the person's name. I added jingle bells to some, made individual gift tags, even made some of the gifts!

Each year, I like to go to the post-Christmas sales and pick up cards, wrapping paper, ribbon, tissue, and anything else to store for the next year's wrapping. I'm pretty good about guessing how much I'll need, but this year, I ran out of ribbon! Gasp!

I saw this idea somewhere, possibly here? and it sure came in handy. The last presents to arrive in the mail this year were for my brothers, and so it didn't really matter that I was out of ribbon.
(Shh... let's pretend I meant to do this all along. Yes.)
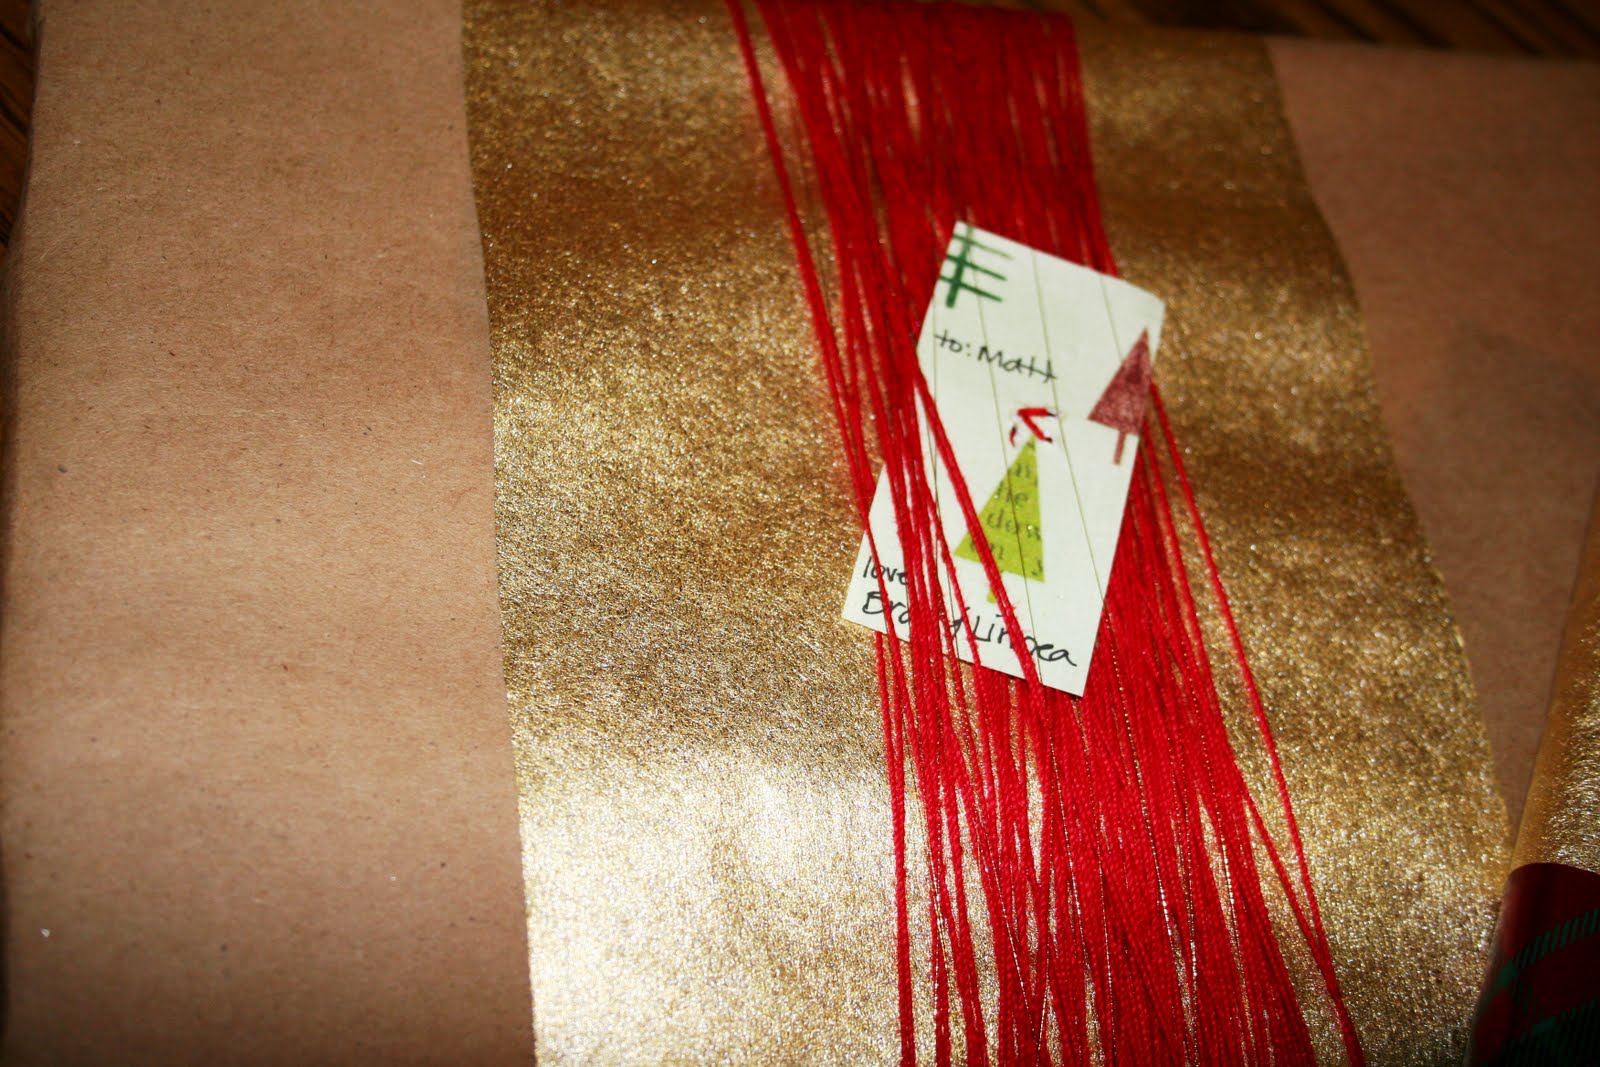
I wrapped the present in the middle with the last of the gold metallic kraft wrapping paper, and had a wide strip left over. Then, I wrapped the other two in kraft paper, using the leftover gold strip as a wide "ribbon" across the middle of each. For the gold-wrapped package, I added a strip of leftover plaid wrapping paper.

Next, I wrapped red cotton string around and around and around and around one of the kraft wrapped packages. It really didn't take very long!
The spool of string sat nicely on one of the dining room chair posts. Norah-kitty was rather delighted by this. I remembered that I have metallic gold thread, so that went on, too. Tucked in a tag, and it was done!

For this one, I first wrapped red around the middle, being careful to line up each wrap of string with the next. Then white cotton string went around the outside of the red string, followed by gold thread and another wrap of red. Pretty!
The last present is for my handsome husband. His gold-and-plaid wrapped gift was finished off with a wrapping of red and green string, with some gold metallic thread to give it a bit of sparkle.

On to the card! I feel like with each card that I made this year, I got more and more creative. I love the way this one turned out! Merry Christmas, Sarah P.!
My friend, Jamie Z. came over for cookie making and tea last Friday, and these are some of my favorite cutouts.
I took waaaaay too much time on my Santa cookie, but I love how it turned out! Look at the little wrapped present and teddy bear in Santa's sack of gifts!
This Scottie dog was supposed to have a plaid blanket, and this is the best I could do! I'm pleased.
Throughout this week, I've also made a second batch of cutout cookies, Swedish ginger cookies, pumpkin pie, and Spritz cookies. I promise I haven't eaten more than...five? or six? Most are wrapped and ready to give! I wrapped some in parchment paper, tied with red and green string, and tagged with a festive fabric label.

Did you know that tape won't stick to parchment paper? Yeah, neither did I. So that was tricky, but I like how it turned out!

So with that, Merry Christmas, friends! I hope yours is full of peace, joy, and love.

Wednesday, June 29, 2011

this is not a craft blog

But it's sure looking that way for these past few posts!

Here's something I made last night. It's inspired by this pleated purse, but as usual, I couldn't do it without some alterations. This is just how I operate (especially with recipes).

Alteration #1: make pleats fold down, not up. No crumb-catching for me.
Alteration #2: make lining about a half inch smaller than the outside layer
Alteration #3: cut straight sides instead of angled with rounded corners
Alteration #4: delete the interior pocket and decorative piping.

I again used some of my mom's fabric stash - a subtle white-on-white sheet for the lining, stiffened with fuseable interfacing; leftovers from a light green floral skirt; a vintage metal zipper; and scraps of pink cotton. I had a quick review session with my mom on how to use a zipper foot... it has been a while! The part of the tutorial that showed how to do the pleats was confusing, and I admit that I had to rip out stitches a few times. I ironed with a ruler in hand more times than I can remember!

Here's the success:

The finished size is about 5.5" high by 9.5" long. Perfect for keeping inside my school tote bag!

It's hard to see...but that white lining has a pretty pattern!

Tuesday, May 12, 2009

feelings are not good at telling the truth

sometimes I feel like my career so far - if you can call it that - has been a blip on the radar or a shooting star. I feel like the things that I've done are good, and that I have been successful, but that I was brilliant for a short time and then disappeared from the sky.

will I have the chance to make a difference like that again? will i have a long term career? do I want that?

it's a good thing that feelings are not (always) truth.

this is an interim time, a dry spell, a cloud across the horizon. I will have the chance to shine again, and it will be good. I will have the opportunity to use my music skills and to teach what I love. but this time is necessary, too.

my husband will finish his degree soon, and then I hope to complete a masters' program, too. (this is slightly scary, since I have not been practicing, and since I am unsure of what program I want to pursue, at all!)
after that, I may teach a couple years, but we want to start a family. I think it's really important that children have their mother or father at home to nurture them, to teach them, and to provide a stable, consistent environment.I don't want to be working at a job other than mothering if I can help it at that point in time.

side note: I love chocolate. one of the realtors here at work gave me a recipe for 5-minute chocolate cake in a mug... I can't wait to try it! maybe tonight. and this dove chocolate square is melting in my mouth. mmmmmmm!

I may be able to teach some private lessons. it does take a lot of work and contacts to build a private studio, but hopefully that will be easier to accomplish through the church that we will be attending at that point. I do think I can balance that and mothering, especially if I can teach during naps. anyone think that's unrealistic? perhaps. or we can put the little one in a play area nearby and begin to teach the baby music, too. oh, yes.

all of my future dreams involve a little bit of fear for me. I suppose that is a normal feeling. Ipray that it won't get in the way of my courage to try! I know the sting of rejection, and hope that I don't have to face that again. iI pray that I have the courage, persistence, and will to build up my skills again to an audition-worthy level, and that I will not be too critical of myself.

I have started to put together a scrapbook to celebrate our first year of marriage. so far, I've done four 8x8 pages - moving day, some pictures of our little apartment, and pictures of the beautiful surrounding area. I need to get some more prints, though. the book is turning out really cute! I would like some more scrapbook papers, too, but we'll see what comes of that. sometimes I am more creative when i don't have exactly what I need, or rather, what I want.

maybe that's what God is getting at in my life. I do have everything I need, but not everything I want. I may need to be more creative with my life at this point, and I know I need to be a good steward of the gifts I have been given (hence the need to practice).

may the Lord grant me the strength to daily accomplish His will for my life, the patience to wait for His timing, and the joy and ability to do all things well.

Tuesday, October 14, 2008

decorating is an art


today while i was out running, i found these bright orange berries on a bush that looked otherwise dead. they're probably poisonous, but my curiosity got the better of me, and so i plucked a stem and continued to run with them in hand. it looked rather funny, by the way! imagine this: i'm wearing a pair of gray Nike capris, running shoes, a bright neon yellow athletic shirt, and here are these orange berries on a stick bouncing around as i run. not only that, but my hair is disheveled because it's morning, and there's only so much i can do to make my ponytail look somewhat decent. at any rate, i arrived home and put them in some water in a spice jar, and they're now decorating my table.

after, of course, a brief photo shoot. :o) i was pleased to find that the orange of the berries is actually a little redder and brighter than the orange of my little pumpkin, and the dark stems in the glass make a nice contrast. i like how it's a bit Asian-inspired, with its sculptural, spare look. these would make great little favors for a fall wedding! wouldn't that be cool? or for a Thanksgiving dinner...

i really think that decorating is an art. it's sometimes hard to find the right color combinations, or the right size item - the best container, the most interesting cloth that won't detract from what's on it. and not only that, but to arrange the materials in an attractive way, so that nothing overpowers anything else except for good reason. i think i did a good job today.

on the orange theme, i reheated some amazing butternut squash soup for lunch. i need to try to make this - what i had came from a lovely company called V8. someday i'll package my food and sell it for a ridiculous price just because i added eight vegetables to a product that should only contain one. i had a coupon for this soup, by the way, that made it about 40% off the original price. hooray, bargains.